Chris Padilla/Blog
My passion project! Posts spanning music, art, software, books, and more. Equal parts journal, sketchbook, mixtape, dev diary, and commonplace book.
- 📕 Official Blender Fundamentals Playlist: Don't be alarmed that it's a few versions behind. The fundamentals largely apply to the current version.
- 🍩 Andrew Price's Beginner Tutorial: A ton of ground is covered in this one. It moves quickly, but it's a great showcase of what's possible in the software.
- 🐻 Louie Zong's Blender Video: Great introduction to stylizing 3D illustrations.
- 🐈 Joey Carlino's Character Modeling for Beginners: Highest amount of A-ha's per minute. Lots of great tips in this one. A good one to watch to start thinking about how you can work efficiently while modeling.
- 🏔️ Procedural Landscapes: Just dipping into this tutorial can give you an idea of how powerful the automation and procedural sides of Blender can be.
- 💿 The Simplest Guide to 90s CGI In Blender by SunnyIsOnline: Y'know, this is the era I was inspired by. Shows how to tone down Blender's horsepower to be more period approrpiate.
- There's a set of rules that requires more than purely logical reasoning. It's often spatial or even economy of movement.
- It's low intensity. Many of us spend our days on problems that require loads of thinking. These are typically great compliments since they keep us moving intellectually, but with a different part of the brain.
- It's often repetitive. One puzzle piece after another. One measure at a time.
- It's cozy. Great to do in the evenings before bed.
- The end result is something beautiful or satisfying, though most of the enjoyment comes from working out the solution, not having it.
Bork
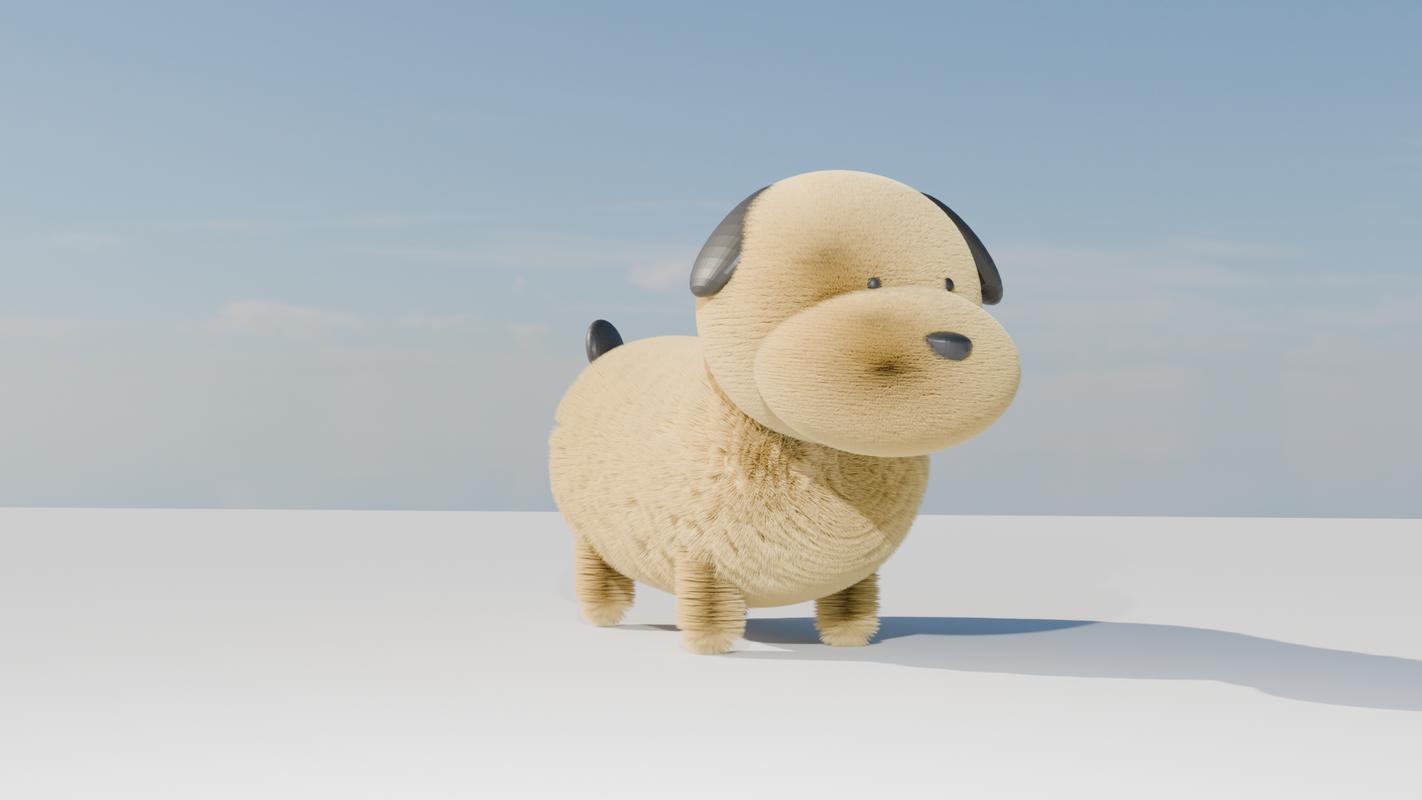
What I think of when I hear the word doggo.
Metal Mario & Textures
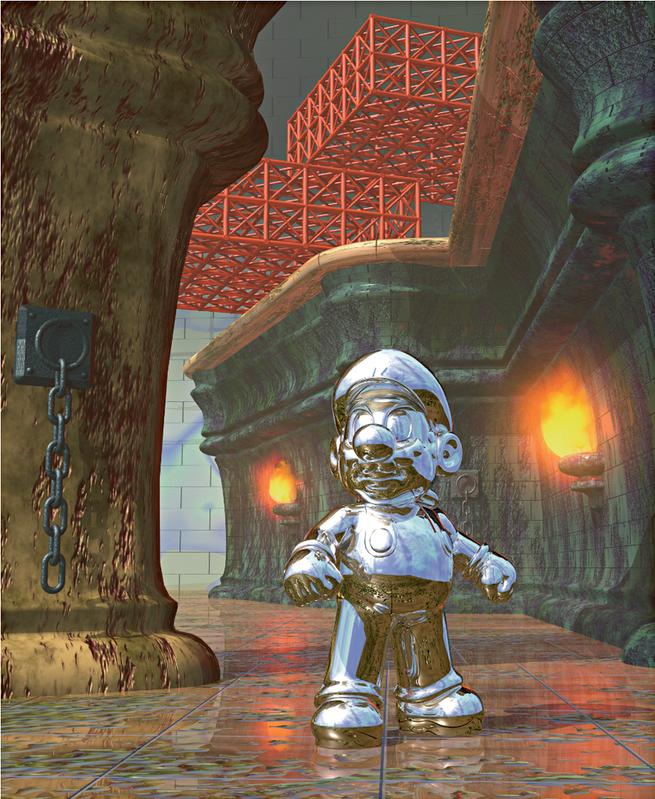
I have an annual ritual of playing through Super Mario 64. I'm super familiar with the game proper.
A delightful new discovery has been the original CGI renders developed to promote the game. This one takes the cake for me.
Another fun crate that I've been digging in is Render96's texture libraries. (The Bakku no Oni collection is particularly fun.)
They specifically archive texture collections that were used for games like Mario 64. Now knowing how the sausage is made, looking through these really gets the imagination going. In both directions: Trying to see if I recognize a pattern, or imagining what type of model a texture could be applied to.
I'm Old Fashioned
This years fancies are passing fancies
But sighing sighs, holding hands
These my heart understands
Mystery in the Water

What could be down there?
The Garden and The Kitchen
It's helpful to think of projects in a couple of ways: one organic, one structured.
A grapevine doesn't bear its fruit right away. The garden is a messy place where plants can come and go. Some bloom before others. Make a dish with what's on hand.
The Kitchen, however, is where those fruits need to be pulled together to make a dish. After seeing what has grown, a meal can be decided on, additional ingredients picked up from the grocer, and so on.
You see what I'm trying to say here?
It's good in your practice to have a garden. To let the organic nature flow through what you're doing. Let curiosity lead, and allow yourself failures and dead ends. Don't feel too tied to any project.
Then, take a set time to give shape to your work. See what's gained traction and what's ready to be harvested. From there, you can start dicing tomatoes, peeling carrots, and boiling potatoes. There's a goal and a structure here. Though, it's all the more delishish because the dish is cooked with fresh, homegrown ingredients.
The other approach is to pick a recipe, go to the store, and buy the necessary ingredients. Sometimes, that's what you have to do. It's purely goal-oriented, without the spontaneity of what's in season.
So pull from the garden. See what ripens next for your kitchen.
Make What Only You Can
Thinking of Neil Gaiman's commencement speech this morning:
And Fifthly, while you are at it, make your art. Do the stuff that only you can do.
The urge, starting out, is to copy. And that’s not a bad thing. Most of us only find our own voices after we’ve sounded like a lot of other people. But the one thing that you have that nobody else has is you. Your voice, your mind, your story, your vision. So write and draw and build and play and dance and live as only you can.
The moment that you feel that, just possibly, you’re walking down the street naked, exposing too much of your heart and your mind and what exists on the inside, showing too much of yourself. That’s the moment you may be starting to get it right.
The things I’ve done that worked the best were the things I was the least certain about, the stories where I was sure they would either work, or more likely be the kinds of embarrassing failures people would gather together and talk about until the end of time. They always had that in common: looking back at them, people explain why they were inevitable successes. While I was doing them, I had no idea.
That's extra reassuring if you are someone whose interests span multiple disciplines, crafts, and mediums. Heck, if you blog from a code editor, I'd say you're one of those people! Making that which only you can.
After having spent many years squarely fitting into a genre, I have to say that the work is all the more meaningful when it's such a unique combination of skills. When, truly, it's something only you can make. There's a mission there. There are ideas looking to come into the world where only a select number of skills can get them there.
Make genre pieces. Make math rock, haikus, and landscape paintings, sure. But, also, make math rock music videos where the lyrics follow haiku structures with a landscape painting as the album art.
Fantasy at Work
Miyamoto:
Kids today have sports clubs after school. They go to tutoring. They are pushed by their parents. Their time is limited.
Yet, even at school, kids are thinking about video games.
When they think about games that are not in front of their eyes, their sense of fantasy is at work.
Even if one doesn't consider this a form of education, it is usefult to have as one becomes an adult.
I think that is very good.
Learning 3D Modeling with Blender
As it may be evident from a few projects, I've been exploring 3D modeling!
I have to say — it is a hugely addictive process! Molding 3D shapes out of thin air is way too much fun.
Blender is my tool of choice. I have a sweet spot for all things Open Source. And wow. What a time to be alive. Growing up in the 90s, there were a few consumer options out there. But it's amazing how powerful this piece of OSS is.
It's pretty dizzying when first learning, but it doesn't take too long to get a grasp of the basics of the software. I've fooled around with it for about a month now and no longer feel entirely lost when trying to model a simple object!
For those curious, here are a few learning guides that have been helpful:
After that, like anything else, you can go pretty far with a few well-worded Google searches.
Bird Box Track
Audio for a project in the works!
Winter Bun
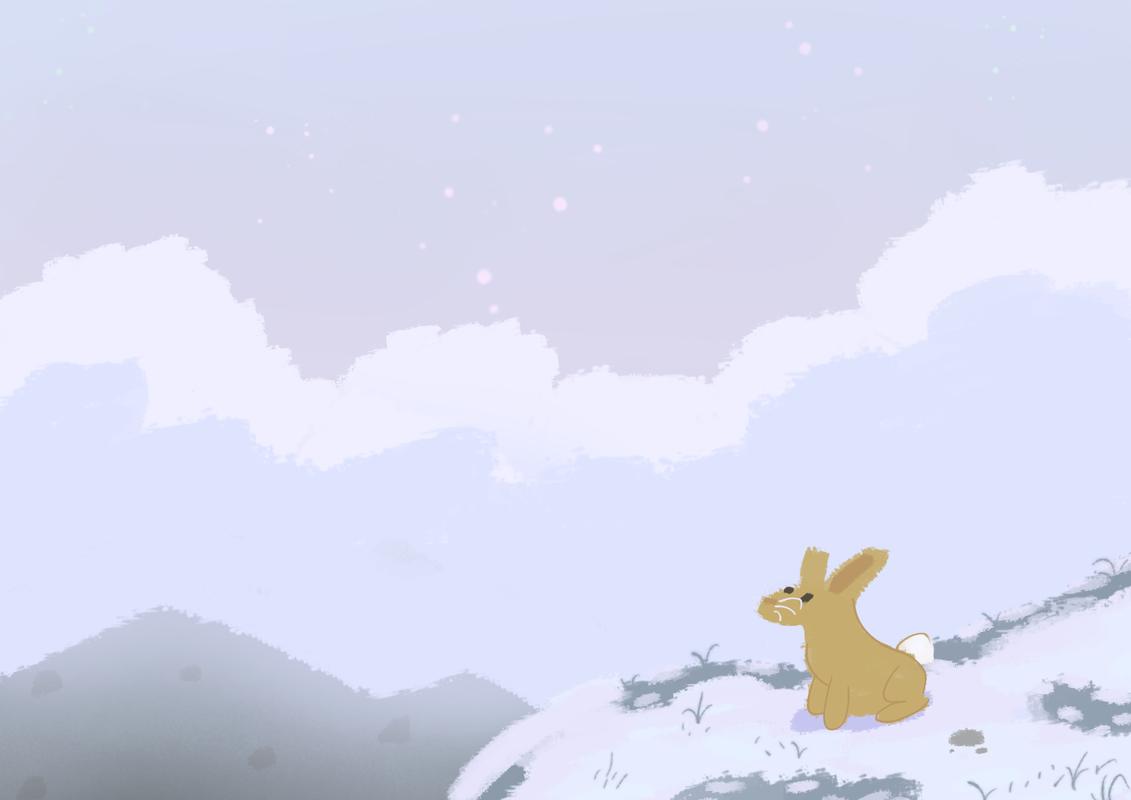
We have tons of rabbits hopping around in our new neighborhood! Love these little guys.
Music as Puzzles
Something that took me a few decades to learn about playing music is that there's no one way to do it. There's also no one reason to do it.
On one end of the spectrum, music can have this perception of being something that "comes from the heart". Images of La Bohème come to mind, the artist that wears their emotions on their sleeves, the ever-romantic. They play what they feel. And yes, that's a part of musicing. I even quite like that part of it! But that's not the only part.
On another end, you can imagine a discipline-driven approach to music. Think child prodigies, the movie Whiplash, or any experience you may have had as a school band student where the aim was to ace your state marching contest. There are some benefits to this approach to music for some people. Personalities with that competitive spirit and skill-acquisition-for-the-sake-of-skill-acquisition can lead with this. I'll admit to having spent a great deal of time driven this way.
Here's one that sits neatly in the middle of the two: music as a puzzle.
Pick your favorite analogy: sudoku, crosswords, knitting, solitaire, wordle. Mine is Pushmo: A Nintendo handheld game where you play as a little guy trying to solve spacial puzzles to reach the top of a structure. The pieces are often shaped like cute Mario characters.
I got to thinking about this while watching my mom work on Jigsaw puzzles during a visit. After I had practiced piano, I started to notice similarities:
I like highlighting this because it takes the pressure off of playing an instrument — needing it to be for some grand purpose. You can simply enjoy doing it!
I see too much advice either in the vein of "You show up in the practice room whether you feel like it or not!" or "Just follow your heart!" The truth is, sometimes I truly don't feel like it, and sometimes my heart is not particularly jazzed about anything on a given day.
But I am regularly curious about solving that puzzle of sound, motion, and phrasing.
A Beginner's Intro to React Native in One Component
Both React Native and Expo have great quick start guides for getting your hands dirty.
If you're really in a rush to see what developing with React Native looks like, I've boiled it all down to one file for you!
import React, { useEffect, useState } from 'react';
import { View, Button, StyleSheet, Platform } from 'react-native';
import { Audio } from 'expo-av';
import { Sound } from 'expo-av/build/Audio';

type SampleComponentProps = {
  soundSource: any; // an MP3 File
};

export default function SampleComponent({ soundSource }: SampleComponentProps) {
  // React hooks work as expected
  const [sound, setSound] = useState<Sound>();

  useEffect(() => {
    const loadSound = async () => {
      // Handle mobile device interactions with expo libraries
      const { sound } = await Audio.Sound.createAsync(soundSource);
      setSound(sound);
    };
    loadSound();
  }, [soundSource]);

  async function playSound() {
    if (sound) {
      // Run certain logic on specific platforms
      if (Platform.OS === 'ios') {
        await sound.setPositionAsync(0);
      }
      await sound.playAsync();
    }
  }

  // Use core library components to render elements
  return (
    <View style={[styles.container]}>
      <Button title="Play Sound" onPress={playSound} />
    </View>
  );
}

// Style components with CSS-like properties
const styles = StyleSheet.create({
  container: {
    flex: 1,
    justifyContent: 'center',
    backgroundColor: '#ecf0f1',
    padding: 10,
  },
});
Let's dig in:
State Management: For the most part, you're writing React code. Hooks such as useEffect and useState work just as they do when writing for the web.
Core Components: A big difference, though, is that you'll be using React Native's Core Components instead of HTML elements. This ensures smooth transitions between the different platform environments. You can see me using Button and View as replacements for html button and div elements.
Expo Libraries: Expo comes with some great handlers for interfaces such as zooming and touch interactions. In my example, I'm using the expo-av library to handle playing a sound on button click.
Styling: Very familiar to anyone who's used style objects in React. Knowledge of CSS translates largely here.
Platform Exceptions: Naturally, some devices handle logic differently. You'll see that I've added a check if (Platform.OS === 'ios'). Here, if running on an Apple device, I'm going to set the audio position back to the beginning of the track before playing again.
That's it! Once this renders out, we'll have a button playing the audio file passed into this component.
Getting It on the Page
Very quickly becoming a big fan of Lynda Berry's work.
From an interview with NPR:
One of the things you'll hear people say, when they tell me they wish they could draw, is, "I see it in my head, but I can't get it onto the page." And then I have to remind them that what they're seeing in their head is not a drawing. Drawing is something that has to come out of your body. And that horror they have is the same horror they might have if a bodily fluid was suddenly released, like suddenly they got a bloody nose or started drooling. It's that same shame about this thing that's out of their control that seems to be coming from them.
My task — and it can be done within 30 minutes — is to get them past that. ... The easiest way to do that is to have them close their eyes and draw. ... The trick is to show them that there's another kind of drawing that is very different than representational drawing.
There are different goals.
Sometimes the drawing that's left over is not as important as the fact that it can transform your mood. You can transform the way that you feel about something. You can crack you up. I mean, you can crack yourself up with an index card and a letter pen. I think it's pretty interesting.
New Album – Amethyst 💎🌊
You sense the opening...
You've traversed to this space several times now. Instead of becoming more familiar, it's only deepened in mystery...
Getting lost in the atmosphere of Liquid Drum and Bass... 💎🌊
Experience the Interactive Short Story 🔮.
Support the ablum on 🤘 Bandcamp.
Gone With the Wind
Just like a leaf that has flown away~